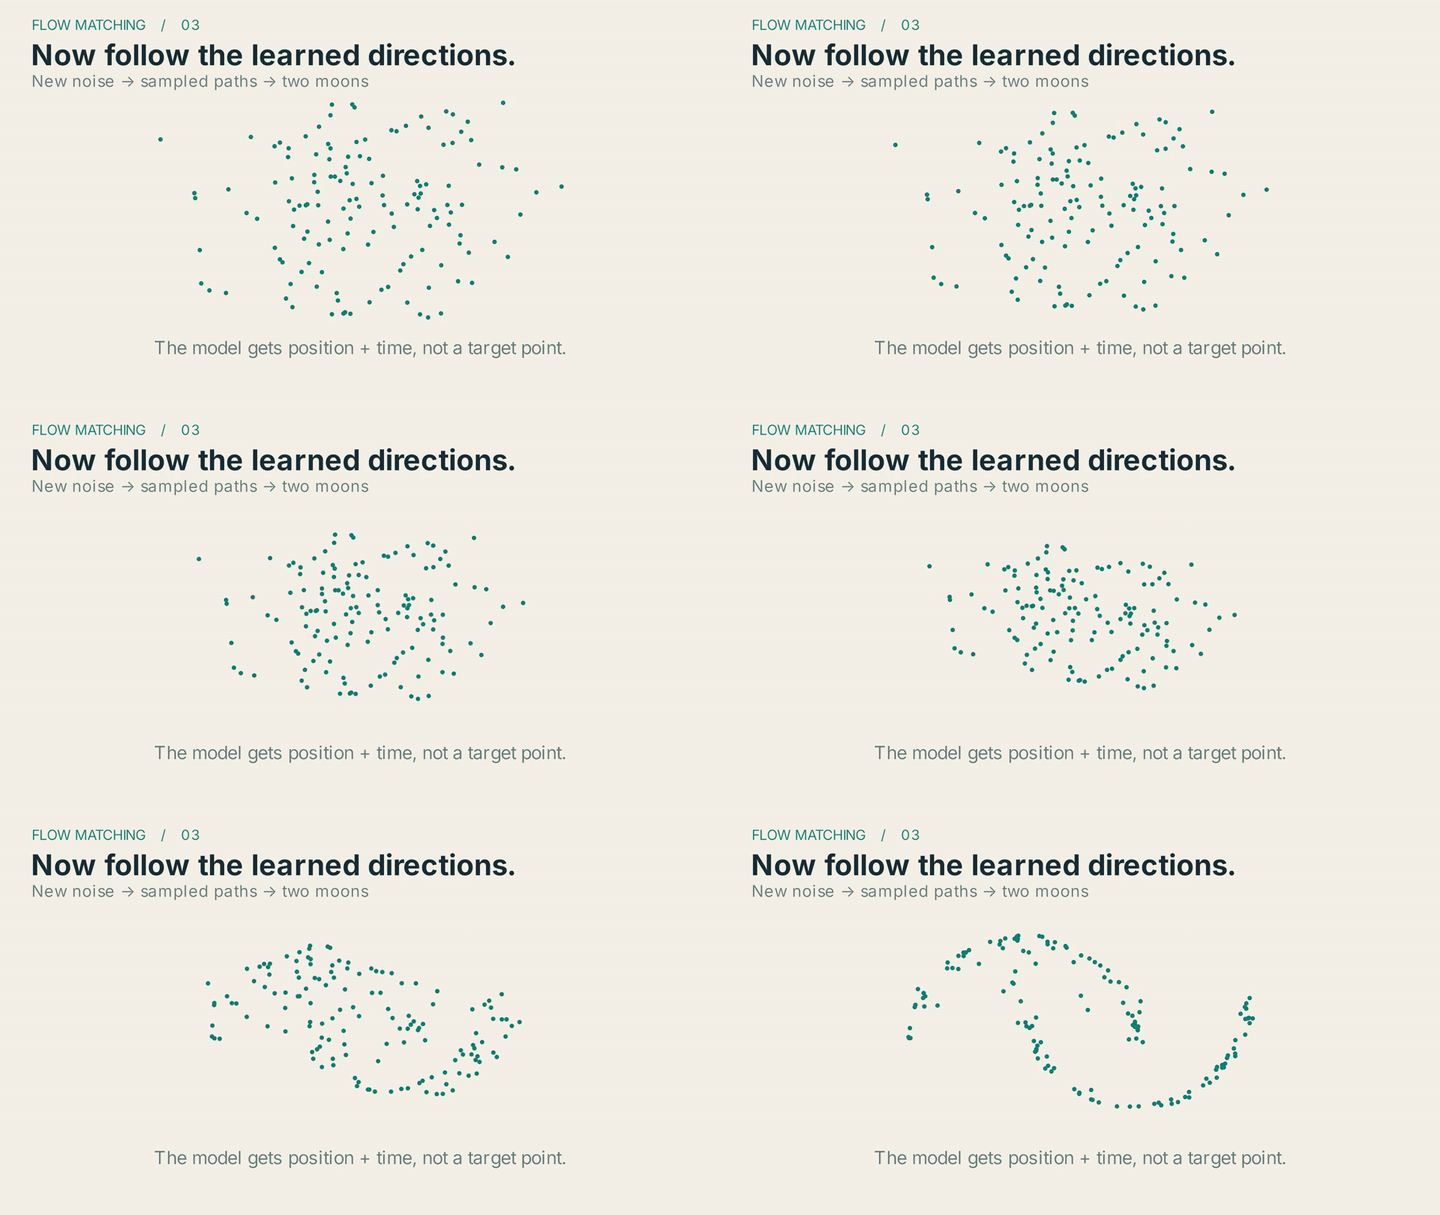
A cloud of noise becomes two curved bands. The interesting part is what the model learned: which direction to move at each position and time.
You can make this explainer with a small neural network, its saved checkpoints and Manim. The animation follows the trained model's calculations, so you can change the experiment and see what actually changes.
What is flow matching learning?
Think of a moving point asking for directions. The model receives its current position and a time between zero and one, then predicts a velocity. Following those predictions moves a batch of new noise samples toward the shape of the training data.
During training, we draw a noise point and a data point independently. Pick a random time, find the position between them, and teach the model the displacement from noise to data. Repeat with many pairs. The model must learn a direction that works across the examples it sees at each position and time.
This is a small version of the construction in the Flow Matching paper. It is a two-dimensional teaching example, not an image generator.
Run the experiment before animating it
A recent Manim explainer shared on X combined actual flow-matching training with animation. That is a useful distinction: a beautiful arrow diagram can explain the training rule, but only running a model shows what it learned.
Use this prompt with a coding agent:
Build a reproducible 2D flow-matching experiment in PyTorch.
Draw Gaussian noise and two-moons data independently.
Train a time-conditioned MLP to predict x1 - x0 from
x_t = (1-t)*x0 + t*x1 and time t, using squared error.

Save checkpoints and integrate each learned velocity field
with RK4 from the same new noise samples. Export the sample
positions and final-model paths to JSON for an animation.
Keep the sampling function independent of target data.
Our network has 19,202 parameters. Its four saved checkpoints make a simple teaching sequence: the untrained model, two early checkpoints, then the learned crescent shape. Use the same starting noise at every checkpoint so a changing random draw does not obscure the change in the model.
Three checks keep the explanation honest:
- Separate training from sampling. A line between a known noise point and a known data point illustrates a training example. A generated sample follows the model's changing predictions.
- Compare shapes, not partners. New samples are not assigned a particular destination point. Check whether the generated distribution resembles fresh target data.
- Check the solver. Increase the integration steps and see whether the paths materially change before treating them as the model's behavior.
Turn the saved numbers into a short film
Give the animation agent the exported data, not permission to invent a convincing transformation:
Make a short Manim explainer with three beats:
one training example, four real saved checkpoints,
and new samples following the final learned field.

Use the exported numerical paths for sampling. Do not tween
noise directly into target points. Keep headings large,
hold each checkpoint long enough to compare, and distinguish
a training-example arrow from the model's sampled motion.
This is useful for a lesson, a research update or a technical product explanation: viewers can connect the rule to its consequence, and you can trace every moving point back to the experiment.
Revise the explanation without rebuilding the whole film
Our first cut gave the final shape too little time to register. We asked Voyager to hold it for two more seconds and move the initial noise farther from the subtitle.
The scene source, training outputs and edit live in the same project. Voyager rerendered the Manim scene as a transparent movie, relinked that source in the native Video timeline and extended its background to match. The opening image stayed in place. The saved model and numerical paths did not need to run again.
Use this adapted revision prompt with your own scene:
Hold the final sampled shape two seconds longer and keep
the initial noise clear of the subtitle. Preserve the
training outputs and opening clip. Rerender only the Manim
scene as a transparent movie, replace its source in the
existing Video edit, and match the background duration.
Revise the explanation in Python while keeping it inside an editable film. You can do the same steps in separate tools; Voyager keeps the managed render and timeline revision in the project conversation.
Download the experiment and film kit. It includes the training script, four checkpoints, numerical paths, Manim source, transparent master and a recipe that rebuilds the editable cut. Unzip it and open index.html to watch offline; the README covers rerendering.
For a simpler data-to-motion project, start with our animated chart from a CSV.
The useful habit is simple: compute first, animate second. When a point moves, you should be able to explain whether it is illustrating a rule or following a model's prediction.
Make your next project in Voyager
Create an account, download Voyager, and start making.