We made Alien Survivor, a small Roblox game in the style of Vampire Survivors, in one Voyager conversation. You play as your own Roblox avatar in a suburban neighborhood at dusk. Aliens pour in from every side, your ray blaster fires on its own, and each level up pauses the game so you can pick an upgrade.
Voyager wrote the game as Luau scripts, then built it inside Roblox Studio through Studio's own MCP server: the map, the lighting, the scripts and every playtest. This post walks through the whole build, starting with the one switch in Studio that makes it possible.
Description / transcript
The banner reads The mothership sends a wave. A ring of aliens closes in. The player runs laps around a block while green and purple aliens follow around the houses, flashes red when hit and levels up to level 3.
What a survivors-like game is
Vampire Survivors, released by poncle in 2022, made the format famous. Its store page sums it up as mowing down thousands of night creatures to survive until dawn. The rules are simple enough to fit in one brief:
- You only move. Weapons fire on their own, aimed at whatever is closest.
- Enemies swarm. They come from every side, in growing numbers and tougher types as the clock runs.
- Kills drop experience. Walk over the gems to collect them.
- Level ups are choices. The game pauses and offers a few upgrades. Picking well is how a run snowballs.
- The goal is to last. A run ends when you die or the timer runs out.
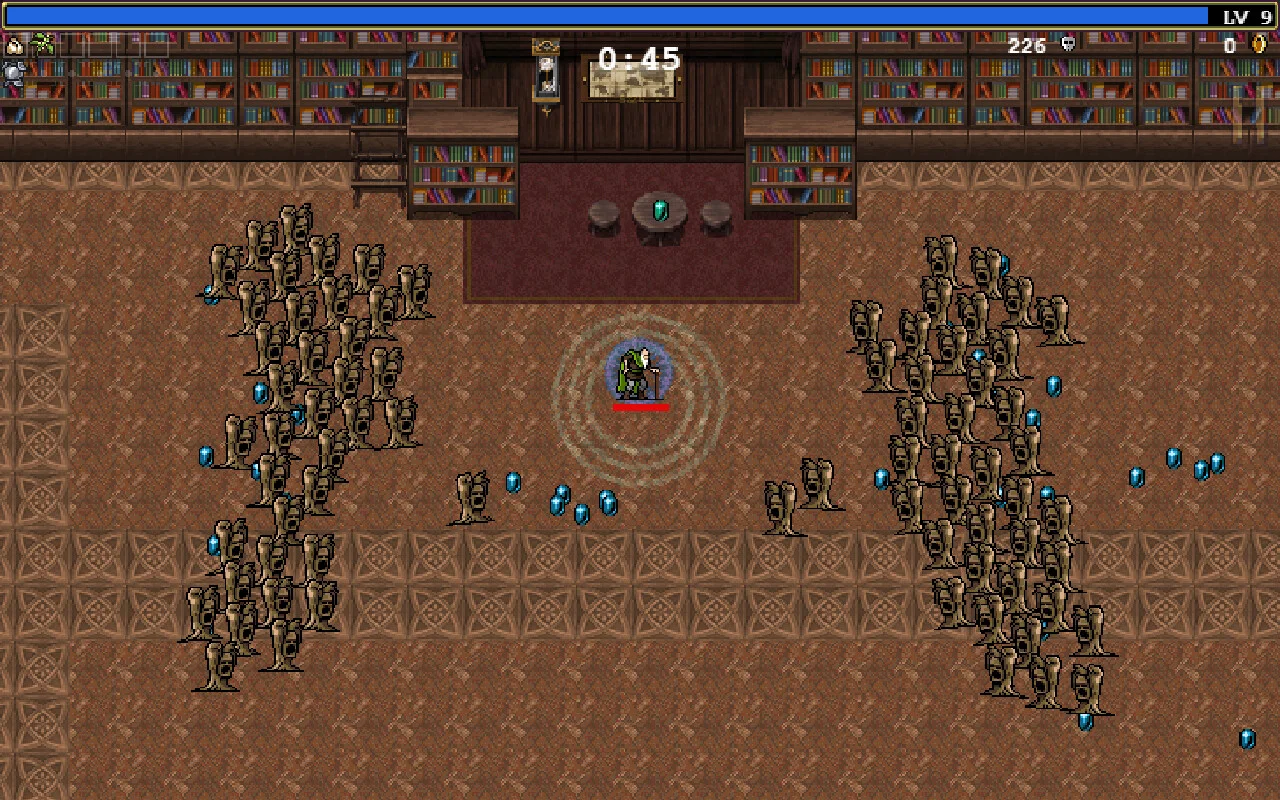
The format suits Roblox well. Every player already has an avatar to play as, Studio builds a neighborhood from parts in seconds, and the whole game can run on the player's own device.
What you need
- Roblox Studio on macOS or Windows, signed in to your Roblox account. It's free.
- Voyager with the
roblox-studioskill. - A Roblox Open Cloud API key, only if you want Voyager to upload sounds or images to your account for you.
- Credits for the key art at the end. Two images cost us about 12 Voyager credits. Everything else in this build is free.
Turn on Roblox Studio's MCP server
Roblox Studio ships with its own MCP server: the connection that lets an agent read and edit your place, run Luau, start playtests, press keys and take screenshots. It is off by default, and only you can turn it on.
Open Studio, sign in and open a Baseplate place. You don't need to save it yet. Then:
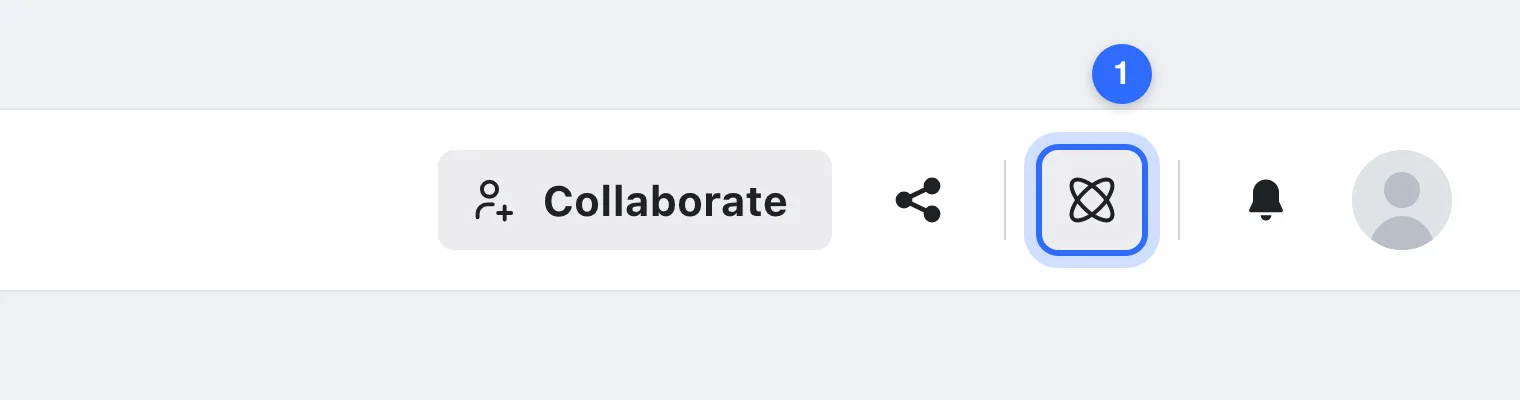
- Click the Assistant button in the top-right corner of Studio, the atom icon between the share button and the notifications bell.
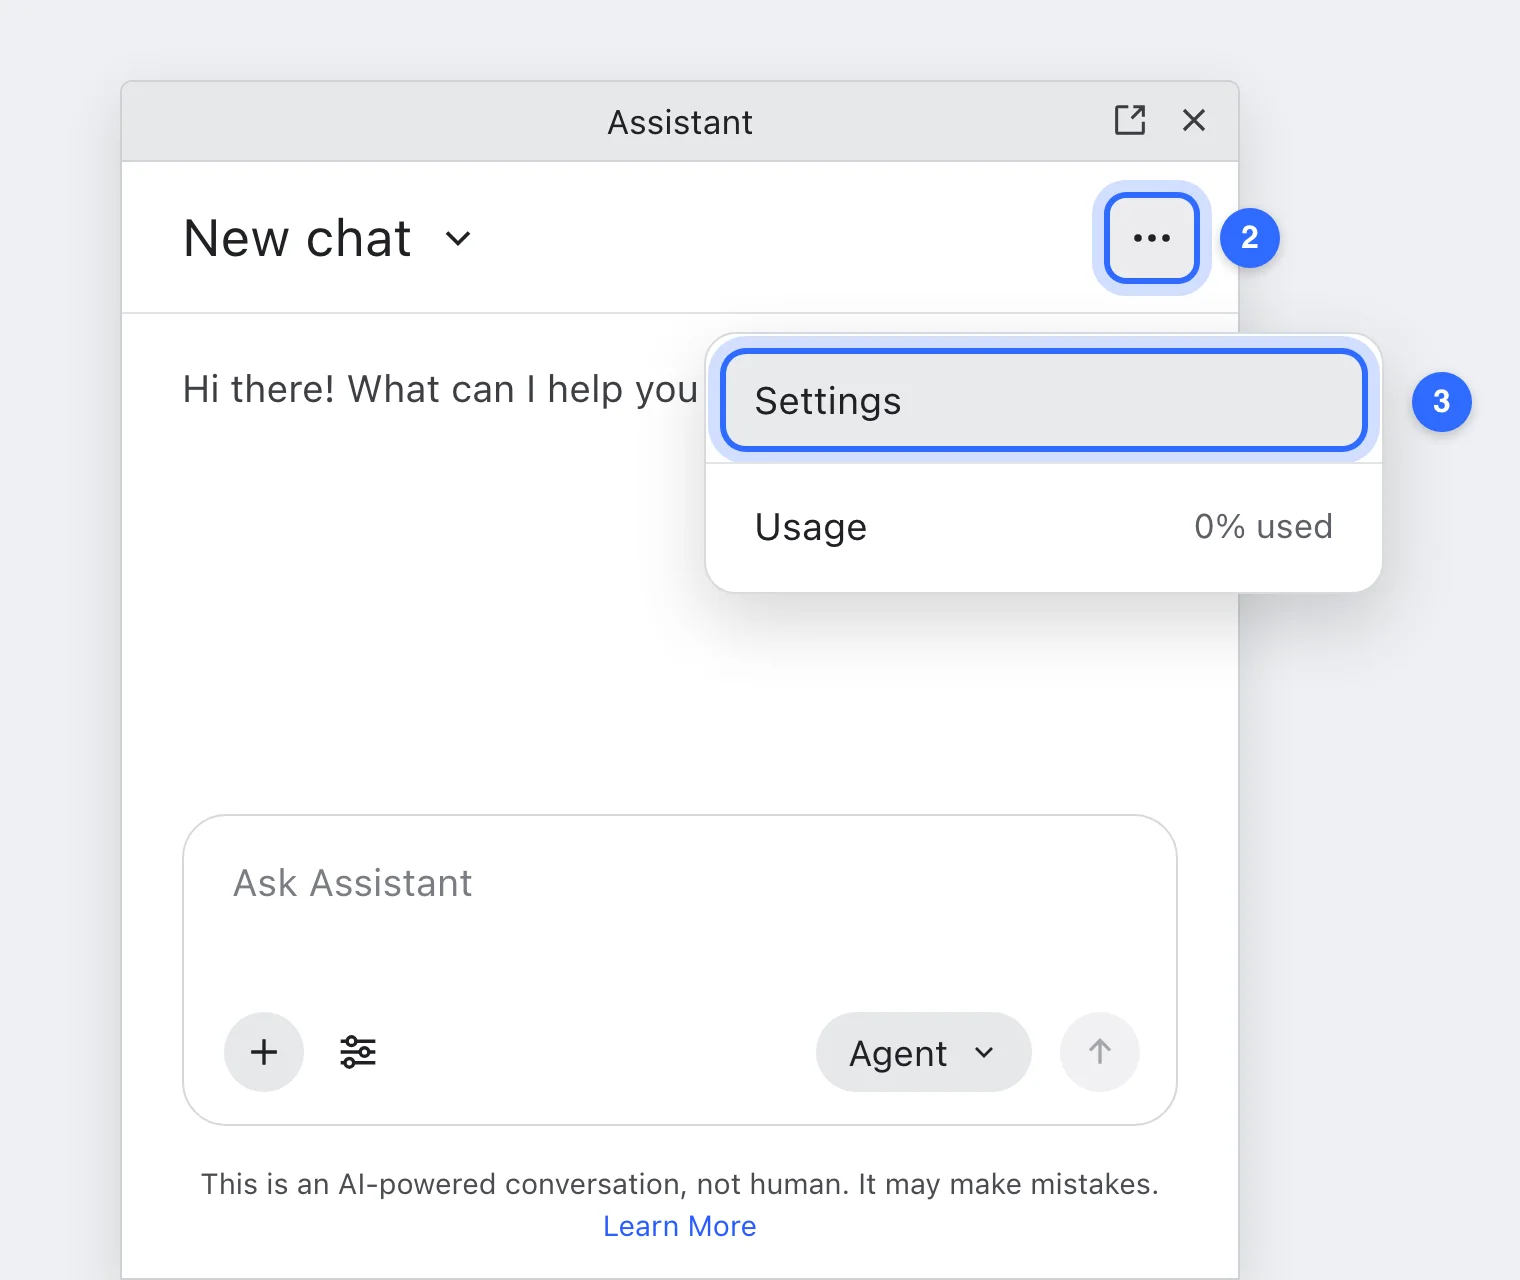
- In the Assistant panel, click the … button at the top right.
- Choose Settings.
- In Settings, open the MCP Servers tab.
- Turn on Enable Studio as MCP server.
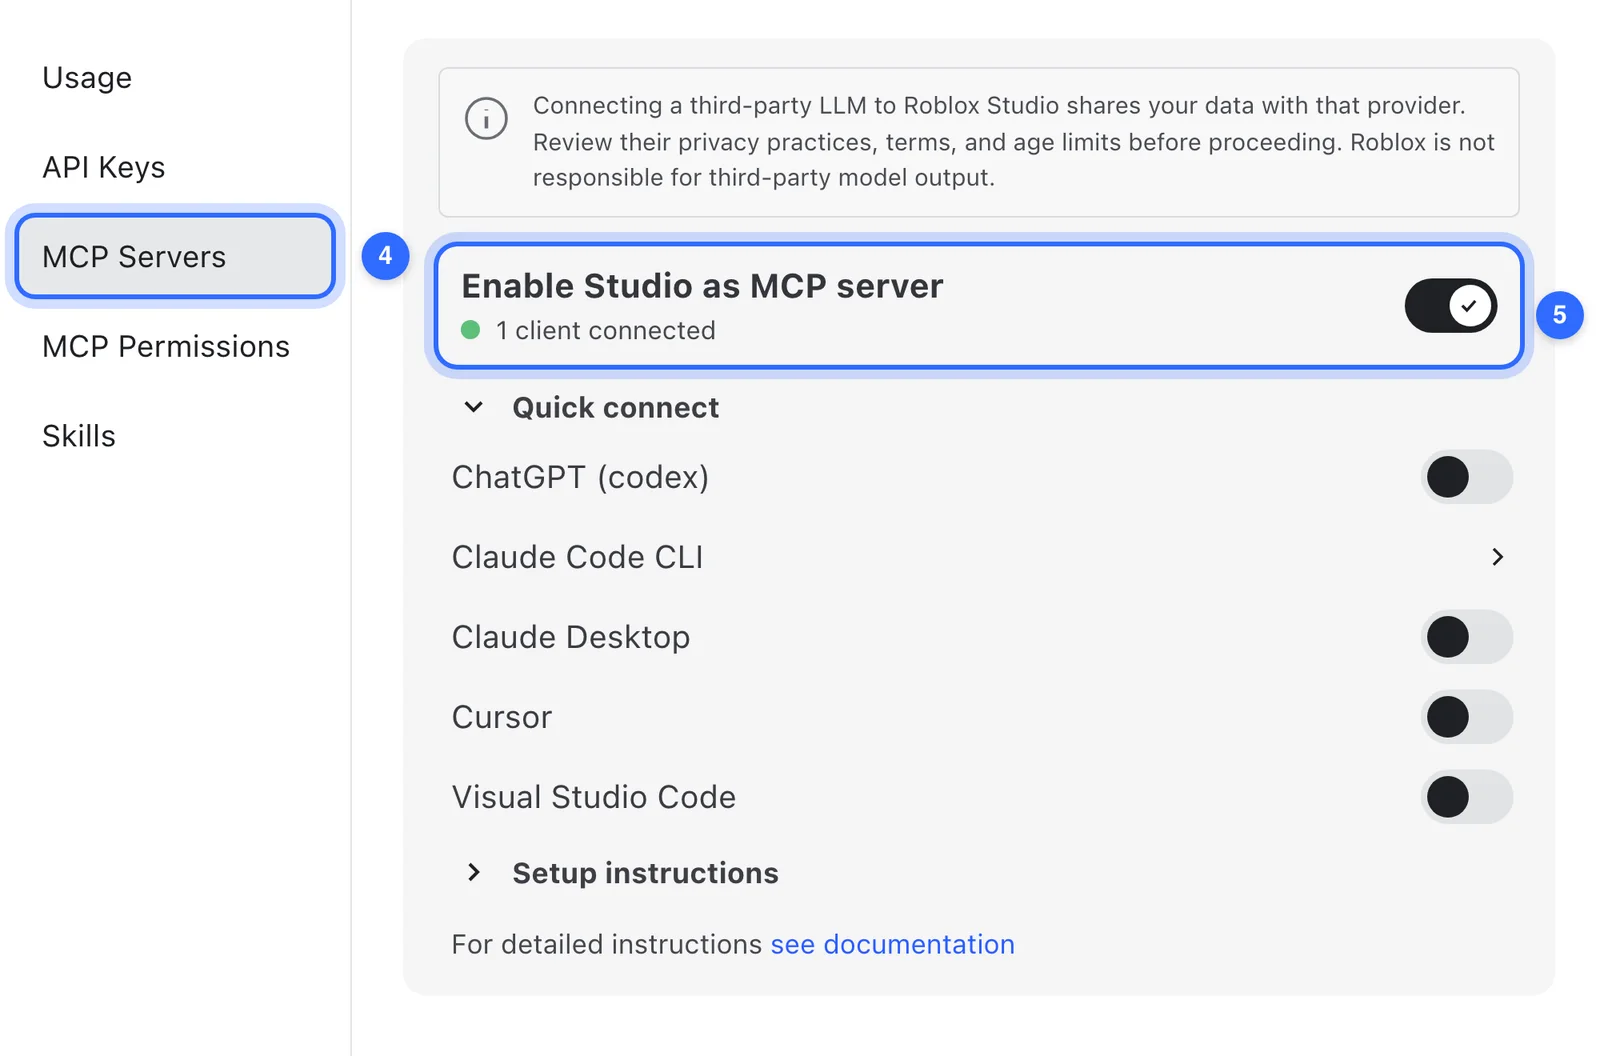
Leave the Quick connect switches alone. They set up other apps, and Voyager doesn't need any of them: when you ask for a Roblox game, it adds Studio's server to its own integrations and waits until the switch is on, so you can flip it after starting the conversation. The green dot and "1 client connected" confirm it worked.
If your Studio shows Manage MCP Servers in the … menu instead of Settings, the switch is in there. If neither is there, update Studio.
Studio has to stay open and signed in while Voyager works. Close it and the tools go away until you open it again.
Brief the whole game in one message
This is the message we started with. It names the genre, the theme, the player character, the setting, how deep the progression goes and the controls:
Let's create a survivor game like Vampire Survivors using Roblox.
Make the enemies aliens and give it an alien invasion theme. Your
character should be your avatar and the environment should be a
suburban neighborhood. Do very basic level-ups for now. Controls
are WASD or arrow keys.
"Very basic level-ups for now" did a lot of work. It kept the first version small enough to playtest in minutes, and the upgrades could grow later.
Voyager wrote the game while Studio was still starting up. Everything lives as plain script files in the project folder, so you can read and edit them outside Studio:
- The map (
src/build/BuildNeighborhood.luau): a street grid with 60 houses with lit windows, driveways, mailboxes and trees, parked cars and street lamps, a park with a crashed flying saucer, a UFO beaming up a car and purple dusk lighting. - The aliens (
AlienFactory.luau): big-headed aliens built from parts in three types. Green Grunts from the start, fast purple Runners after 40 seconds, armored Brutes after 90 seconds, plus a ring of aliens every minute when "the mothership sends a wave." - The game (
AlienSurvivorClient.client.luau): your avatar under a top-down camera, a ray blaster that fires at the nearest alien, XP crystals to collect, and a level up that pauses and offers three of eight upgrades: more damage, faster fire, extra shots, orbiting energy orbs, a shock pulse, speed, more health and a wider pickup range. - The screens (
Hud.luau): health and XP bars, the timer, a kill count, the level-up cards and a game-over screen with a "Defend again" button.
Then it built the neighborhood in Studio (2,259 parts), installed the four scripts and started a playtest.
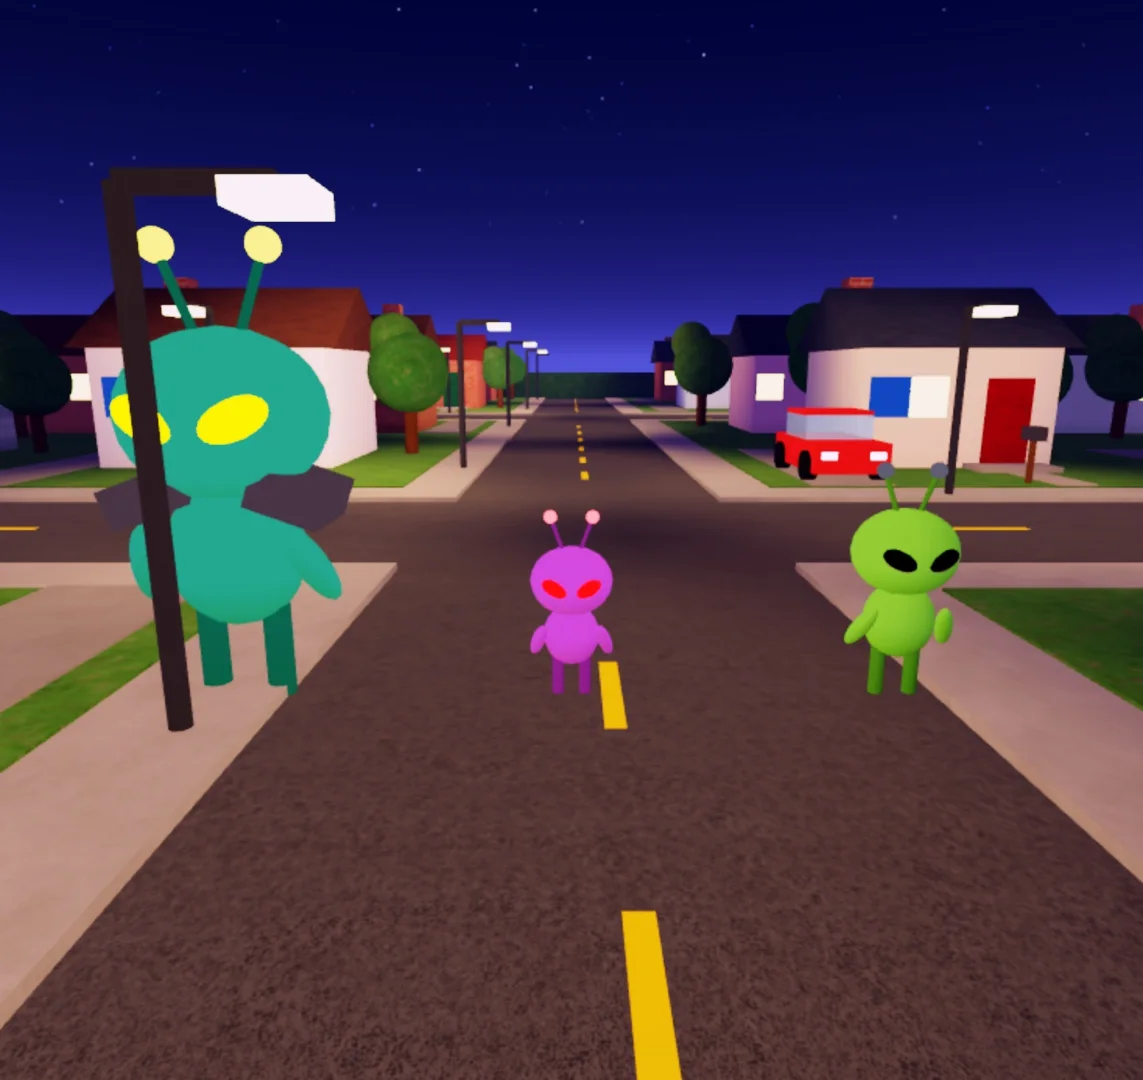
All the gameplay runs on each player's device. Movement stays smooth and the game can truly pause for a level up, but in a multiplayer server each player fights their own invasion.
Playtest, then say what you see
Because Studio's MCP server can start a playtest, press keys and take screenshots, Voyager tested the game itself before handing it over. That first pass caught three problems:
- The game froze at the start. Newer Studio builds don't always add Roblox's default player control script, and the game waited for it forever. That step became optional.
- Movement missed keypresses. The script now tracks each key going down and up.
- Players died in about six seconds standing in a swarm, so alien damage came down.
Some problems only show up when you play. On our first try, the aliens were invisible: something kept hurting us, but nothing was there. We said so, and Voyager inspected the running game. Only each alien's invisible root part moved to its spawn point, while the visible body stayed frozen where it was built. The fix moves the whole model into place before adding it to the world, and the check now counts detached bodies instead of just counting aliens.
Describe what you see in plain words, as you would to a teammate:
The aliens are not showing up for me. Inspect the running game
without touching the controls, find out why, fix it and playtest
again. Show me a screenshot of aliens approaching.
Make the aliens walk around houses
The first version moved aliens in a straight line, through houses and cars. We asked for real navigation:
The aliens are walking through the houses and other obstacles.
Make them walk around them, and keep it fast with a lot of aliens
on screen.
Voyager chose a flow field over Roblox's per-character pathfinding, which would get expensive with 160 aliens. The map becomes a grid of 3-stud squares with every house, car, tree, lamp post and the saucer marked as blocked. Whenever you step into a new square, the game works out the shortest route to you from every square nearby, and each alien follows it. Aliens that get bumped into a wall slide along it. Recomputing the routes took 0.2 to 1.4 milliseconds in the playtest.
It also turned off the place's streaming, so every player's device knows about every obstacle on this small map.
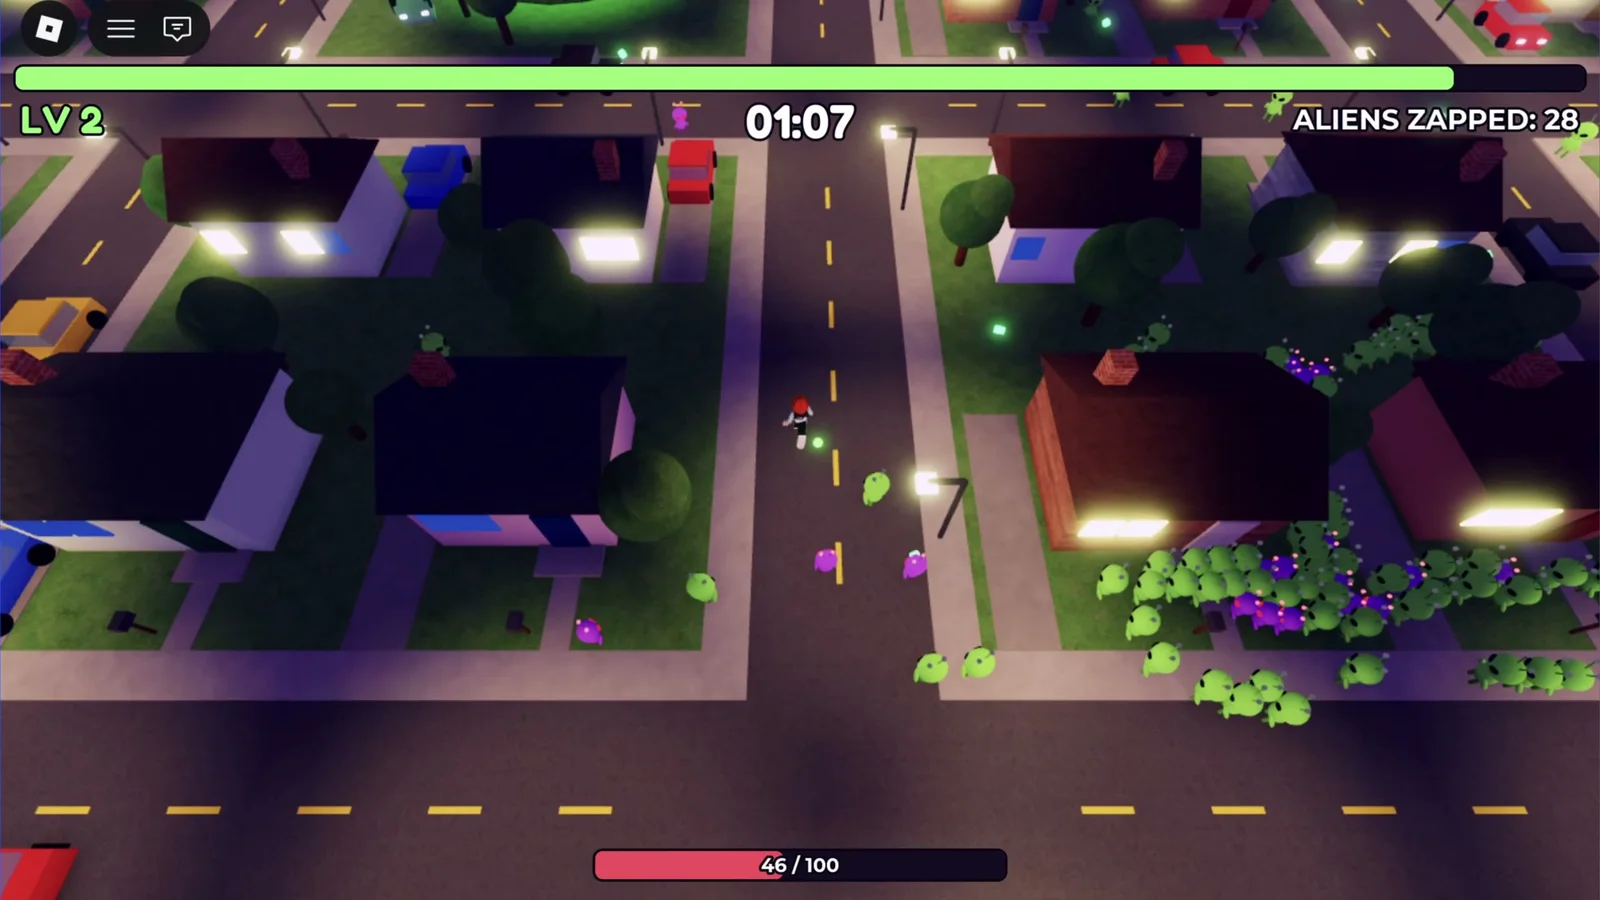
Add sound effects from a free library
We asked for sound effects from a free game sound library. Voyager picked seven free sounds, a laser zap, a slime splat, a glass tink, a level-up chime, a hit thud, a force-field hum and a game-over boom, and wired them in. Most of them vary their pitch slightly each time, so a swarm dying doesn't repeat the same splat, and the blaster and pickup sounds have a minimum gap so rapid fire doesn't turn into noise.
Roblox only plays sounds uploaded to Roblox, so the files had to go to your account. That takes an Open Cloud API key, which Voyager asks for on a secure card it can't read. Create it at create.roblox.com/dashboard/credentials:
- Choose Create API Key and make sure it belongs to your own account, not a group.
- Add the Assets API with both Read and Write access. Write is the one most often missed.
- Under Accepted IP addresses, add your current IP address. With none listed, Roblox refuses every request.
Our first key was missing a setting, and Roblox answered "The API key may not do this." Fixing the key and saving it again was enough. All seven sounds passed Roblox's moderation, and each one's volume lives in Config.Sounds.
Record gameplay and make key art
For the clip at the top, we asked for 15 seconds of gameplay in 1080p. Voyager ran a warm-up, then recorded takes while driving the controls, timed to catch the one-minute wave. Its first takes stalled on a level-up screen or ended in a death, so the clip comes from the fourth. It cropped the game view out of the Studio window and brought the audio up to a normal level for online video.
The test recording found a real bug: the level label and XP bar sat under Roblox's own menu buttons in the top-left corner, where every player would have lost them. The HUD moved below Roblox's top bar.
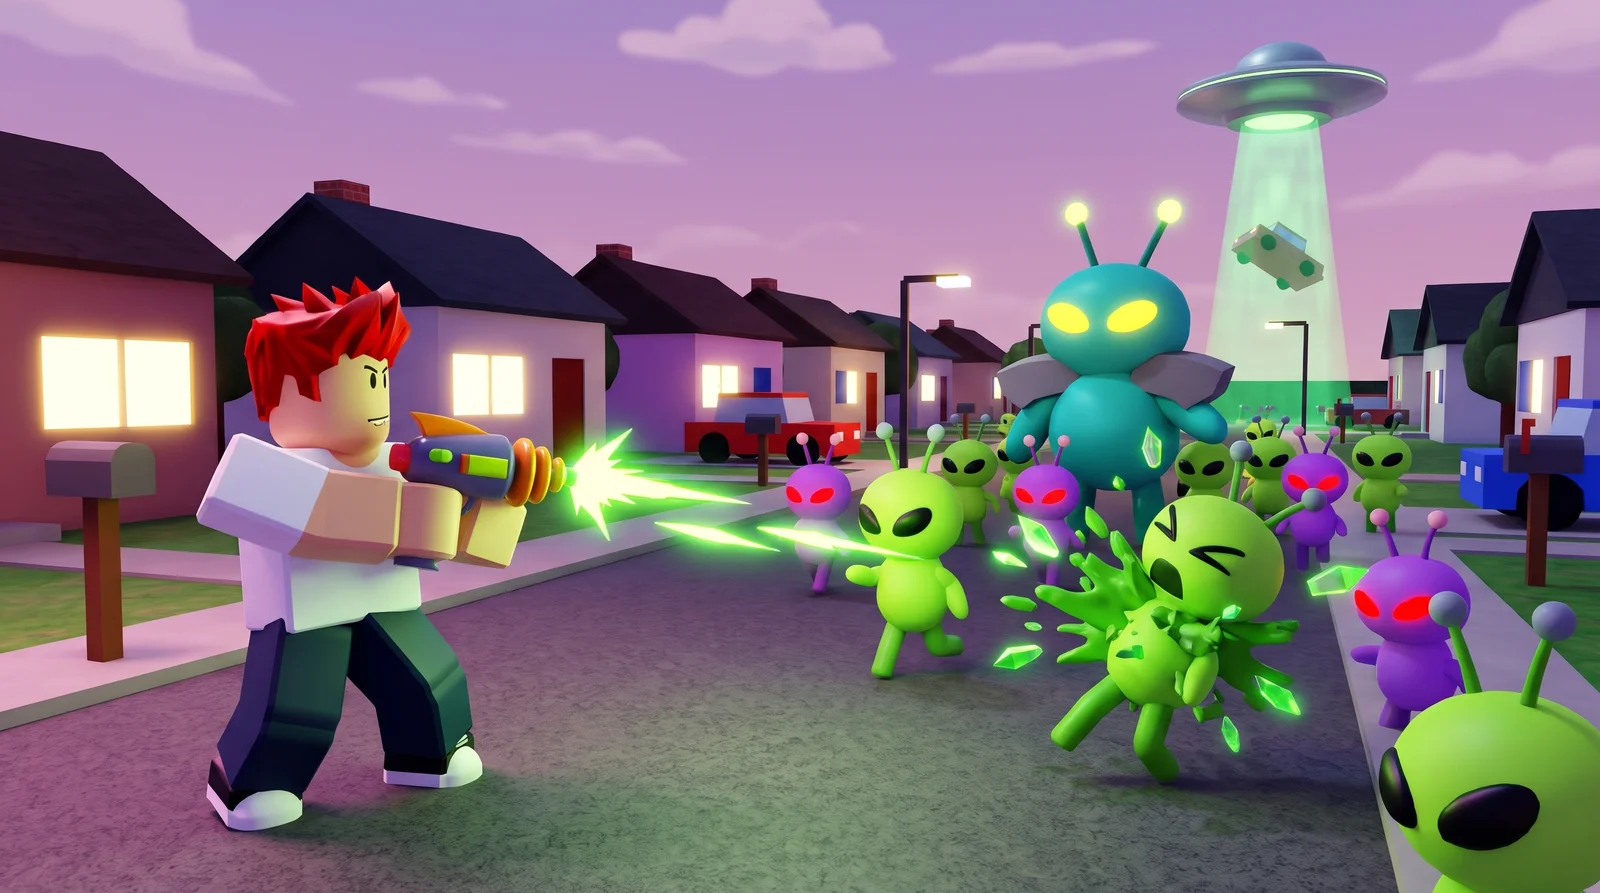
Last, we asked for a thumbnail. Voyager used frames from the playtests as references, so the key art keeps the real avatar, aliens and neighborhood.
Save the place and keep playing
Voyager builds into the place you have open, and Studio doesn't save it on its own. Use File → Save to File As… and save it into the project folder. The scripts stay in src/ too, so the game can always be rebuilt in a fresh Baseplate.
Getting from an empty Baseplate to an invasion with sound, a gameplay clip and key art took one conversation, and most of our part in it was playing the game and saying what felt wrong. Press Play, last as long as you can, and when something bugs you, tell Voyager what you saw.
Technique
Make your own in Voyager
Opens a new chat with “Roblox survivors-like game” attached and the steps from this post. Nothing runs until you send it.
Needs Voyager 2026.11.5 or later.