A CAD assembly already knows how the product is built: every part, where it sits and how the pieces fit. A product film made from it should never have to guess.
For this example, we turned an open-source six-axis robot arm into a 34-second film: macro close-ups, real joint motion, a separation into an exploded view and a reassembly, all from the original geometry.
Description / transcript
Instrumental industrial score. Titles read Thor, then Inside Thor during the exploded view, then Thor again.
Keep the geometry exactly as designed, and spend your effort on light, lenses and motion. If the import is wrong, fix the import. Remodelling a part to make a shot easier turns a product film into an illustration of a product.
What you need
- Skills:
edit-in-blenderandmake-music. - Plan: Starter or higher, for the generated score. Bring your own track and any plan works; the renders ran locally.
- Tools: Blender with Cycles, FFmpeg, and a CAD converter such as FreeCAD for formats Blender cannot open.
- Made in Voyager: this example is a real Voyager run of the workflow, from the CAD import to the final render.
Start with the native assembly
We used Thor by AngelLM and contributors, licensed under CC BY-SA 4.0. Its native FreeCAD assembly links every subassembly, so the parts arrive in their saved positions with their colors. Native files such as .FCStd or STEP beat STL for that reason. Read the actual license file before you start; a model being downloadable does not make it open source.
Make a [duration]-second [aspect] product animation of [product]
from [CAD file]. Keep it accurate to the CAD: no remodelled geometry.
Finish: [main color] with [secondary materials]. Setting: [environment].
Show it moving at its real joints, with an exploded view and
shallow-focus close-ups of [key features]. Camera style like
[reference]. Music: [brief or existing track]. Record the CAD
license and every change in CREDITS.md.
When Blender cannot open the format, convert the native geometry and apply the assembly's saved placements. Our 517 parts were tessellated at 0.06 mm. Then compare the part count and the bounds against the source, and treat any mismatch over about a thousandth of a millimeter as a failed import.
Check the scale before you light anything
Our scene arrived five times too large. Nothing looked obviously wrong, but depth of field depends on real distances and surface grain depends on real size. One Blender unit has to equal one real unit, with cameras and lights scaled together.
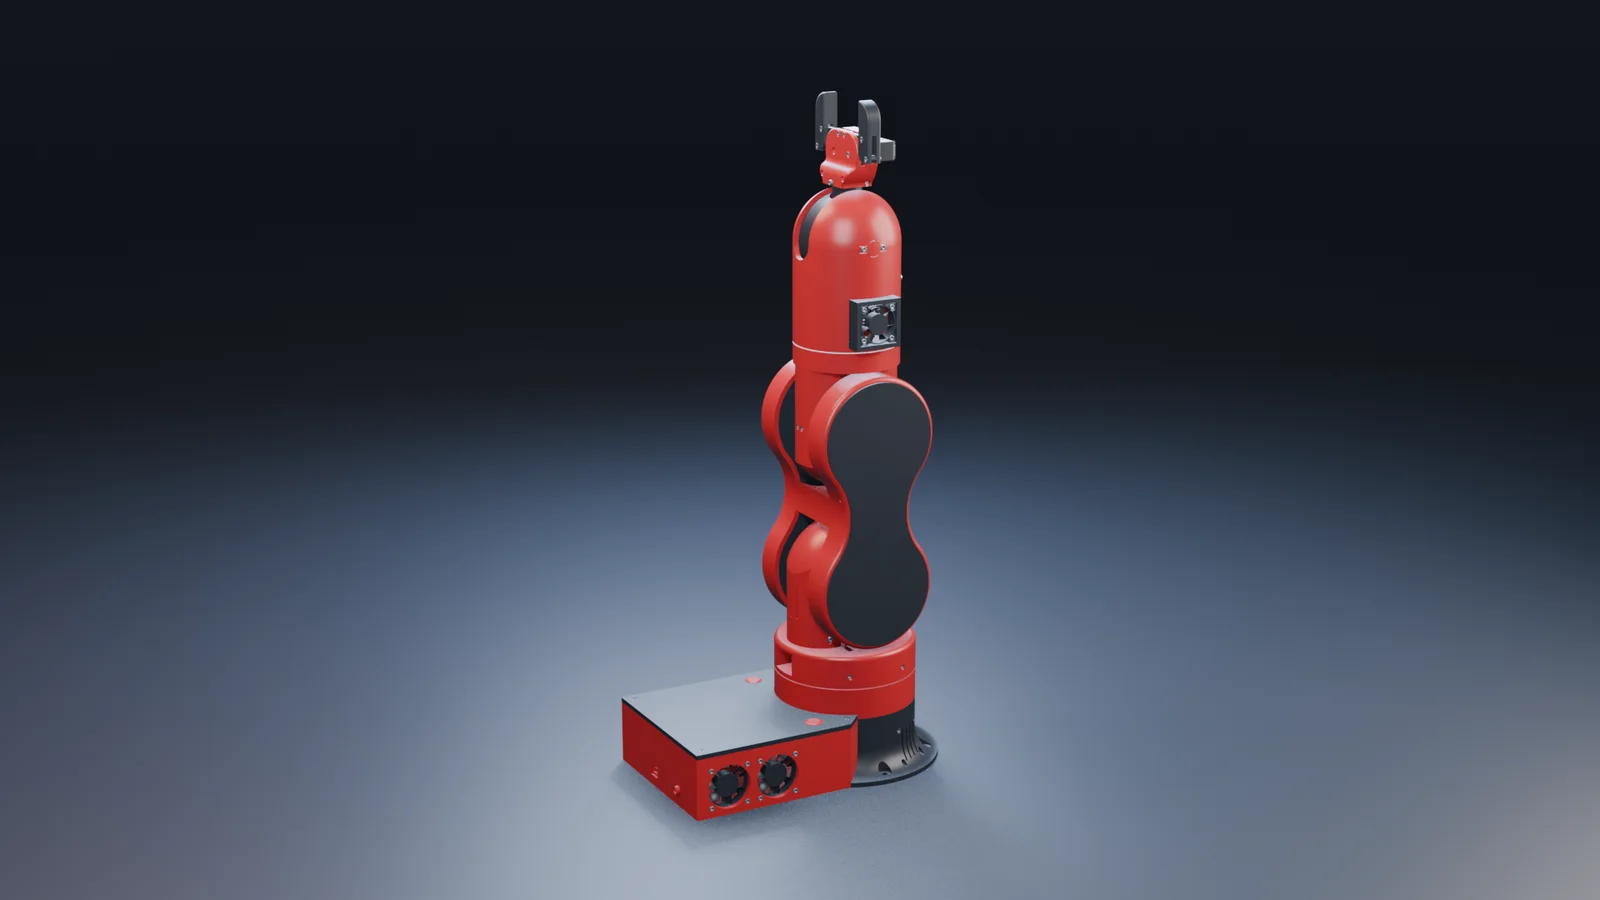
Approve a single still of the whole product first. It is the cheapest place to catch an upside-down part or a missing subassembly.
Rig the joints from the CAD
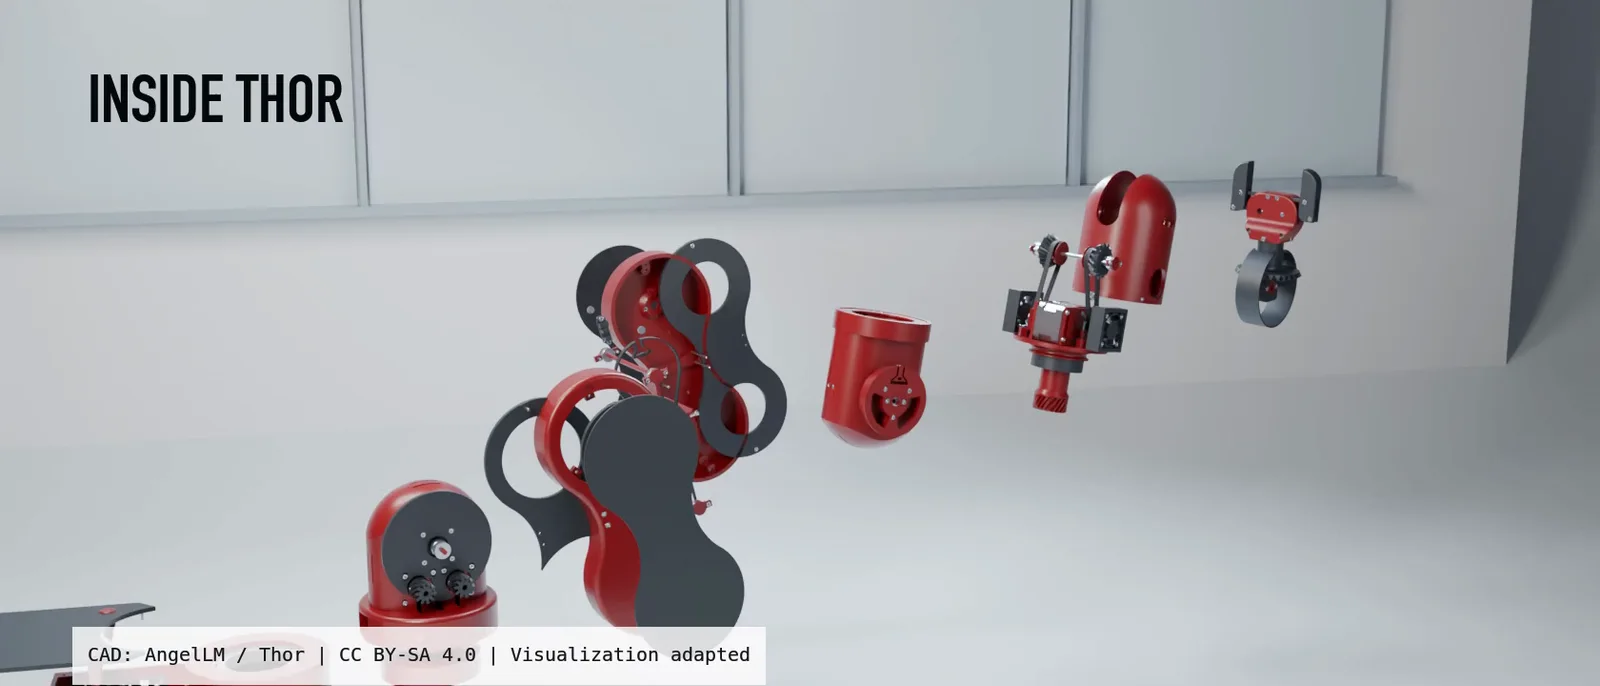
Read each joint's anchor from the native assembly and cross-check the axes against the product's own kinematics, here the Thor URDF. Parent each subassembly to its pivot. Group the exploded view by logical subassembly, so covers, fasteners and drives travel together, and present the spacing as illustrative.
Rig articulation from the CAD's own joint anchors, and check each
axis against [kinematics file]. Parent every subassembly to its
pivot. Animate only the real joints and an illustrative exploded
offset. Group the exploded parts by subassembly.
Shape the light, then the lenses
Flat light made the arm look like a diagram, and a white set with broad fill washed the red out. Area lights fixed it: a warm key, a weak cool fill, a cool rim and a soft top strip, with very little world light. The factory walls, glazing and partitions are separate invented geometry behind the product. Treat the materials as presentation choices, not specifications.
Plan the shots before animating: macro openers, a whole-product reveal, joint details, one continuous separation into a five-second exploded hold, the reassembly and a hero ending. Vary the lenses from 24 mm to 135 mm macro.
Two details made the close-ups work. Focus on the visible surface, found by casting a ray every frame; focusing on a part's center left the macro subjects blurred. And keep the separation and hold on one continuous camera. A cut between two near-identical angles made the parts appear to jump.
Preview cheaply, then render in sections
Render a reduced preview of the whole cut with temporary music, and iterate on pacing there. Put the titles in a separate overlay scene so lens blur never softens them.
We generated an industrial score through Voyager and fitted it to the cut. Benchmark the heaviest shot before committing: the approved final, Cycles at 32 samples with GPU denoising at 1680×720, took about 35 to 40 minutes for 816 frames on an Apple-silicon laptop. A 256-sample version at 2520×1080 projected four to six hours and was not worth it.
Render each shot in its own process to PNG frames. Metal GPU renders crashed at camera switches, and per-shot frames meant a crash cost one section. Then decode the finished file and look for one-frame lighting flashes before delivering.
We also made a heavier photoreal pass. The earlier satin look was preferred, and it is the version shown here, so keep every approved version rather than overwriting it.
The film adapts Thor and is shared under the same CC BY-SA 4.0 license, with the credit shown on screen. Bring your own assembly, and let the real parts do the explaining.
Technique
Make your own in Voyager
Opens a new chat with “CAD → product film” attached and the steps from this post. Nothing runs until you send it.
Needs Voyager 2026.10.17-0 or later.