
I'm a big fan of Cary Grant and Audrey Hepburn movies, and I wanted to make a scene that feels like it belongs in one of those 1960s classics: sharp suits, open-top cars and a cliff road in golden light. A car chase was the obvious pick, and it's also the scene where previs pays for itself. Every shot depends on where two cars are at that instant, how fast they're going and when the road runs out. Get the numbers wrong and no amount of good-looking footage will make the cut hold together.
So we wrote a 30-second chase on a cliff road: a man in a silver roadster catches a runaway yellow convertible whose driver has passed out, wedges his briefcase on his own accelerator, leaps into her passenger seat and steers her to safety as his empty car goes through the guardrail and off the cliff. Voyager built it in Blender to real road dimensions, then turned it into film scene by scene with Seedance 2.5.
Let the physics decide the shots, and let the model decide the look. Because the road, the speeds and the impact were all worked out in Blender, every Seedance scene had to match something real, and each fix was a small edit rather than a reroll.
What you need
- Skills:
blender,make-image,make-ai-videoandinstagram-edits. - Apps: Blender, which Voyager finds and runs in the background. Instagram Edits on an Apple silicon Mac, if you want the timeline there.
- Credits: our run spent about 5,700, about $57 on the Creator plan, all at 1080p. Rendering at 720p would cut that to about $23, or about $10 at 480p. You can also bring your own API key, such as fal's, and pay the provider directly.
- References: a model sheet for each character and an image of each car.
- Made in Voyager: this example is one real Voyager chat, from the first prompt to the export.
Describe the scene and ask for real dimensions
Write the scene the way you'd pitch it, with the speed, the length and the beats in order, and ask for accurate dimensions. This is close to the prompt we started with:
Let's create a previs of a car chase on a mountain road, built with
accurate dimensions so everything is right. A man drives a convertible
at about 100 mph, chasing another convertible whose driver has passed
out at the wheel. He catches up, matches her speed, locks his
accelerator with his briefcase and jumps into her passenger seat as
the road heads into a bend over a cliff with a railing. He brakes her
car to safety while his empty car breaks through the railing and goes
off the cliff. End on a helicopter shot of her car, safe. About 30
seconds, with plenty of establishing shots of the wheels, the road and
the two cars together. Build it in simple blocks in Blender. Don't
render it; I want to play it in Blender first.
Asking not to render keeps the first rounds fast. Voyager builds the scene and opens it in Blender, looking through the shot cameras, with a timeline marker that switches camera at every cut. Press Space and the whole cut plays in real time.
A realistic set
I wanted a bit of accuracy in this chase. At about 100 mph, a car covers 45 meters every second, so a cut that's a beat late or a bend that's a little too tight changes the whole stunt. If the road, the speeds and the distances were real, every shot built on them would be believable too.
The road came back as a real US two-lane mountain road: 3.66 meter lanes, a rock wall on one side and a 250 meter drop behind a guardrail at standard height and post spacing. It starts with a long bend you can take at 100 mph. The bend at the end has a 100 meter radius, and with good tires nobody can take it faster than about 69 mph. That's why the empty car goes straight through the rail.
Everything else follows from the speeds. She holds 100 mph. He peaks at about 121 mph and pulls alongside at 11 seconds, half a meter from her door. His empty car hits the railing at 24.1 seconds at a 15 degree angle, and she stops in a gravel pull-off on the inside of the bend at 29.2 seconds.
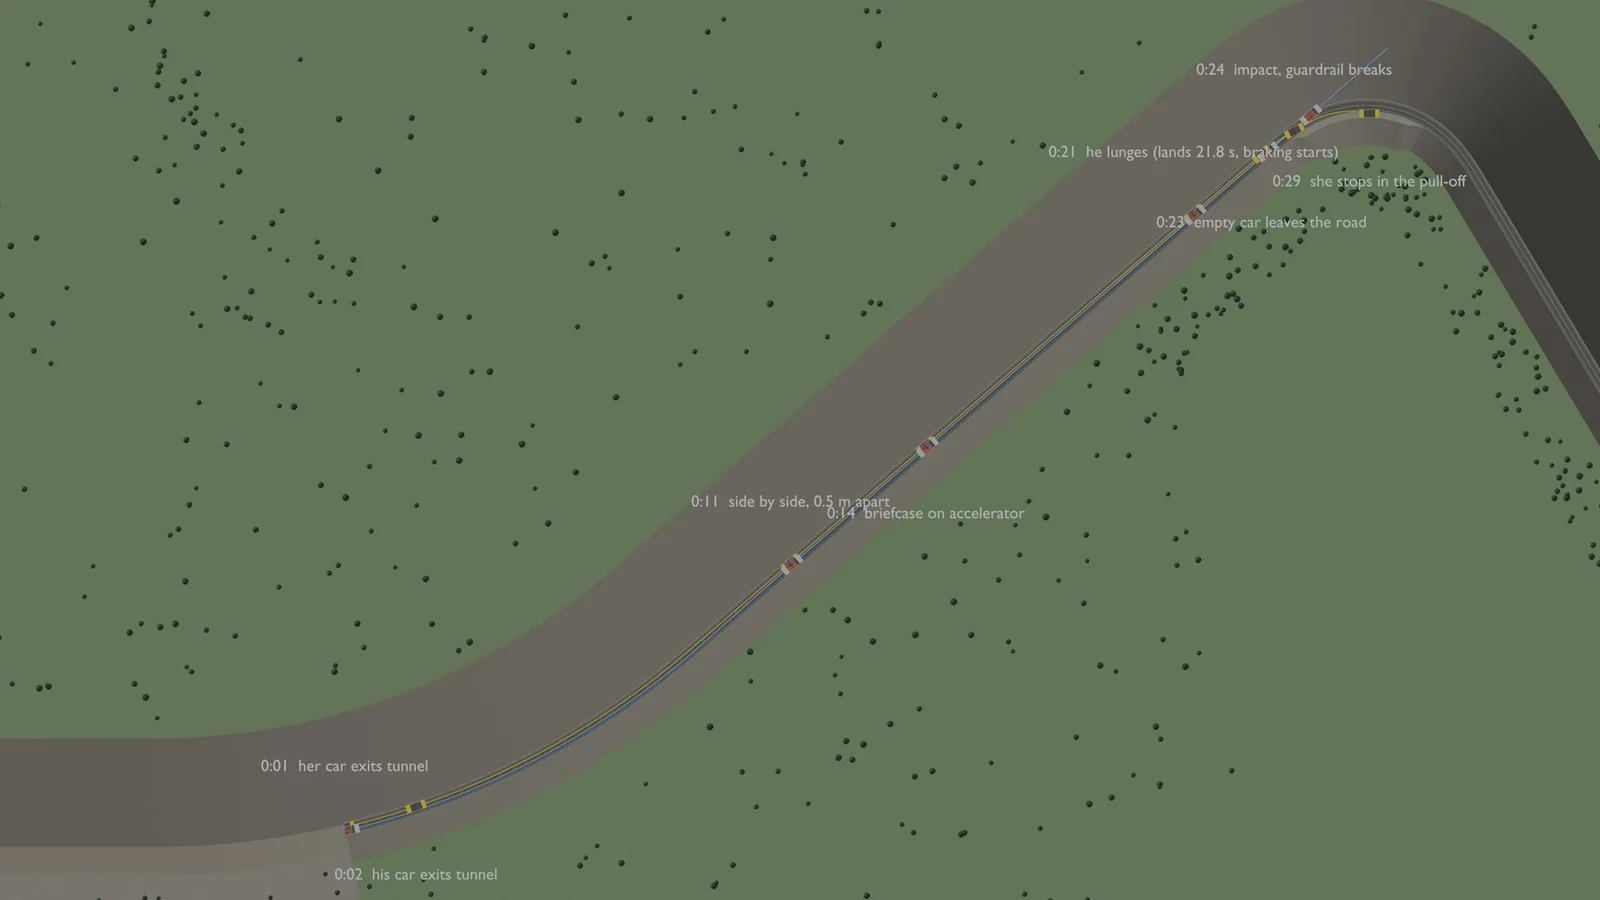
All of it lives in one build script and one data file. Change a speed, the bend's radius or a shot's timing, and the rebuild keeps every number consistent.
Direct the shots by frame number
Nothing had been rendered yet. I scrubbed through the cut in Blender, looking through each shot camera, and stopped wherever a shot needed work. Blender shows the frame number on the timeline, so each note could point at the exact moment to change.
Then give notes the way you would to an editor, by frame. These are some of ours:
For the shot around frame 370, make it a close-up of the man's car,
with him looking from the woman to the front to notice the road is
ending. Then zoom in on the road ending.
When showing the woman, have his car and him in the foreground, so we
see her from his perspective.
At frame 582, have the railing open up accurately in line with the
movement of the car, and have one piece of the rail fly out.
Voyager answers with what changed and what stayed put. The railing note, for example, became a railing the car's real outline pushes open frame by frame, with a two-meter piece torn free and knocked out ahead of the bumper. When a change moved the timing, it moved everything that depended on it and said so.
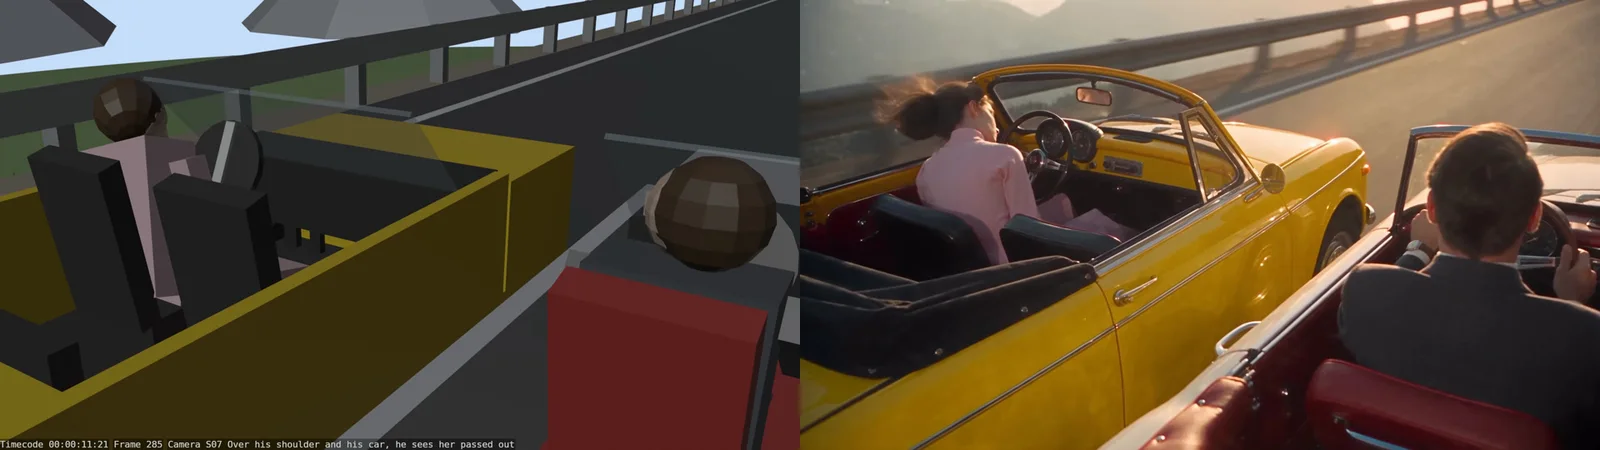
Once the shots worked, we asked for a bit of shake on the closer shots. The wides stayed steady, so the shaky ones stand out.
Cut the jump like a movie
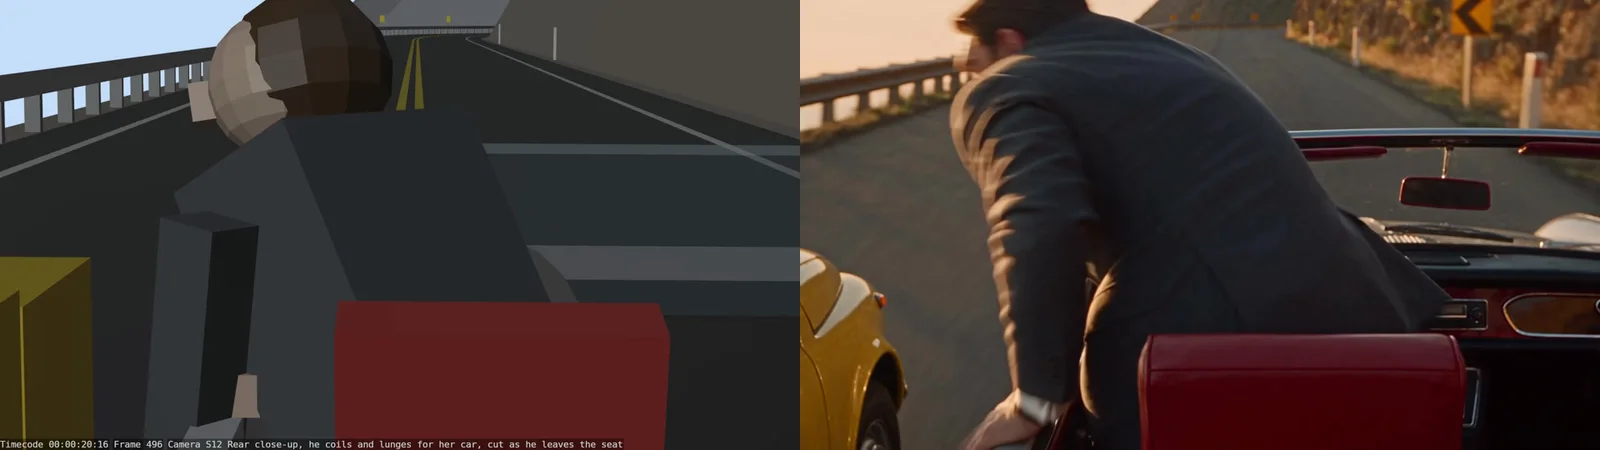
The first version showed the whole leap from one car to the other, and the Seedance take of it looked fake. Movies don't show it either. They show the preparation and the push-off, then cut to the landing.
The jump isn't convincing. Like in movies, change the angles to show
the prep for the jump and the start of the lunge in close-up, then cut
to him landing in her car without showing the jump itself. Fix the
previs in Blender so we can look at it.
After two more notes, the lunge shot ends at frame 510 while he's still on his seat, and the next shot is him dropping into her passenger seat from her back seat's point of view. Voyager moved his landing, her braking and her stop by the same 0.8 seconds so the physics still held.
Turn each scene into film
When the previs was right, we asked Voyager to render it and generate it scene by scene with Seedance 2.5, using our reference sheets:
Render this out in Blender so we can generate these scenes, scene by
scene, using Seedance 2.5, with the correct instructions for the story
that needs to play out. Use these model sheets for the characters. His
car is the silver car and hers is the yellow car. Place all the
rendered videos in a timeline in Instagram Edits.
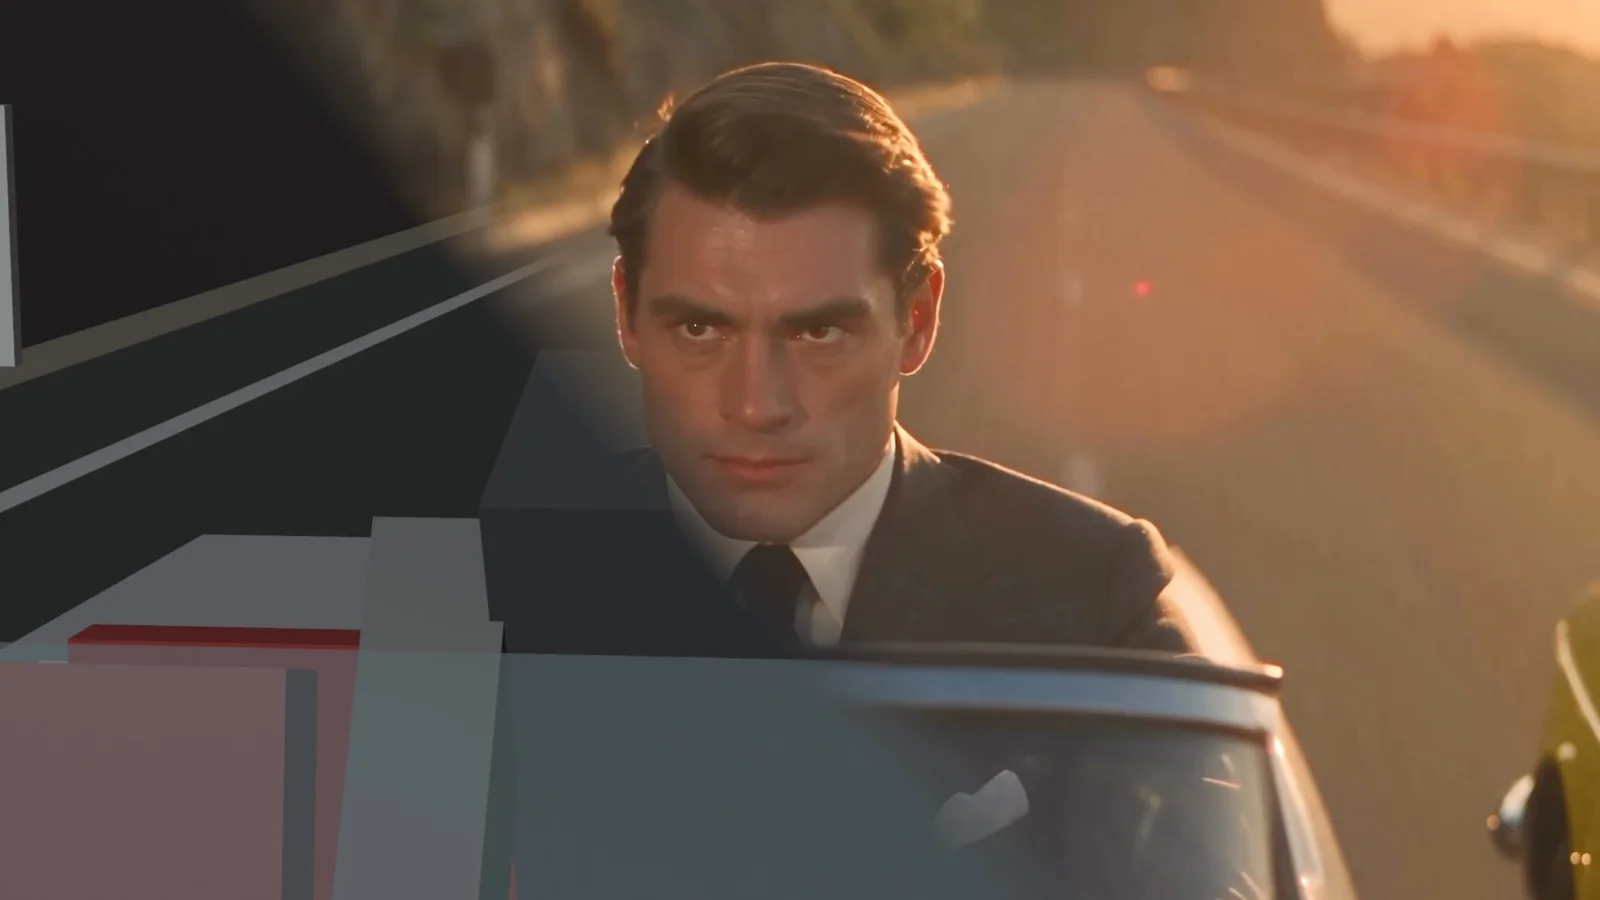
Voyager first resized the stand-in cars to the real cars in the references and recolored the cast to match the sheets, then rendered all 720 frames in under a minute. It cut the previs into four scenes of 6 to 9 seconds, each a length Seedance accepts, and put them in an empty Edits project at 24 frames per second.
Our first sheets looked too much like Grant and Hepburn themselves, and Voyager won't put real, recognizable people into a stunt sequence. It gave both characters original faces and kept the wardrobe, hair and 1960s look, for about 14 credits, or 14¢.
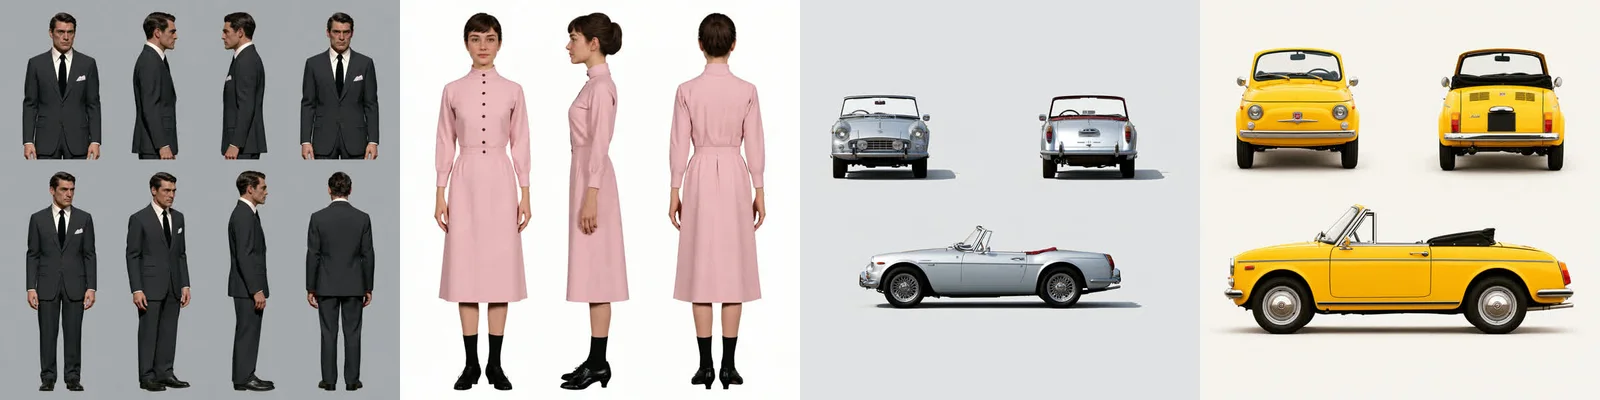
Each scene's prompt gives Seedance the four references and that scene's previs clip, and tells it the gray blocks only mark position and motion. Then it lays out the shots second by second. We also asked for a filmic look, which went into every prompt so the four scenes match:
@Image3 is his silver roadster, @Image4 is her yellow convertible,
@Image1 is the man. Follow @Video1 exactly for camera position, camera
movement, cut timing and where each car is; the gray blocks in @Video1
only mark position and motion. 16:9, 9 seconds, five shots with hard
cuts. Look: shot on 35mm Kodak 250D color negative with anamorphic
lenses, fine organic grain, soft halation, warm golden late-afternoon
sun, natural motion blur, shallow depth of field on close-ups; no
digital sharpening, no HDR look, no CGI sheen.
0-2 seconds: his point of view over the silver hood inside a dim
tunnel; far ahead the yellow convertible bursts into daylight.
2-4 seconds: hard cut, wide from out over the drop: ...
Engines roaring, tire roar, wind. No music.
The four scenes at 1080p cost about 2,279 credits, about $23. Each took a few minutes, and Voyager swapped them into the Edits timeline in place of the gray previs.
Fix one moment, not the whole scene
Watching the cut, we listed what was wrong in one message: extra cars in the background, his feet on the wrong pedals, the wrong shape of road sign, and a railing that didn't break where the car hit it. Voyager fixed the previs where it needed to, then edited only those moments in the Seedance scenes and kept everything else.
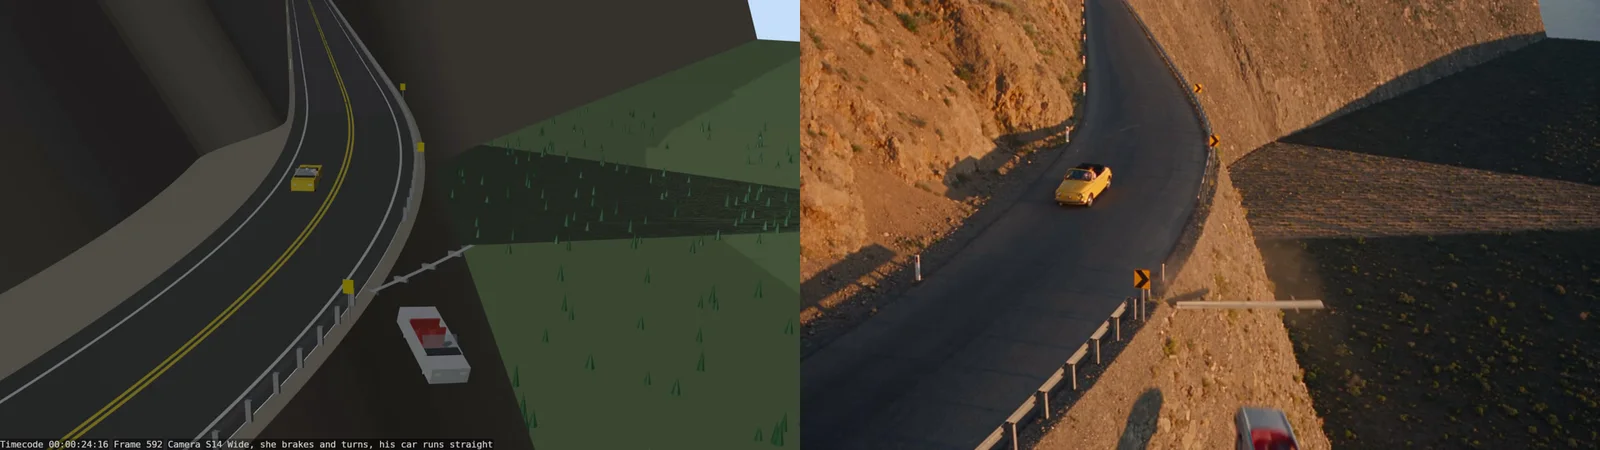
Later notes were just as small: no whoosh sound on the jump, his hands bare in every scene, and her car yellow in every shot of scene B. When a take came back with a problem Voyager could cut around, such as nine frames of his legs leaving the car before the cut, it trimmed them instead of paying for another take. The fixes added about 3,440 credits, about $34, more than the first pass.
Export both versions
Last, we asked for the previs animatic from Blender and the final cut from Edits. The animatic is the full 30 seconds at 1080p, with each shot's name, frame number and timecode stamped in the corner, so it lines up with the film shot for shot.
Start with one short sequence, and work out where the cars are before anyone decides what they look like.
Technique
Make your own in Voyager
Opens a new chat with “3D Previs → AI film” attached and the steps from this post. Nothing runs until you send it.
Needs Voyager 2026.11.13 or later.

Founding Designer, Voyager
Sam is the founding designer of Voyager. Previously a lead product designer at Netflix, Instagram and Spotify, Sam builds creative tools that help creators bring their full vision to life.